I was standing in my friend Sarah’s bathroom last month, complimenting her new shower curtain, when something else entirely caught my attention. The grout between her subway tiles looked absolutely pristine—crisp white lines that made the whole space feel like it belonged in a magazine. Just three weeks earlier, those same lines had been a dingy gray that made the entire bathroom look tired and dated.

“How did you get your grout so white?” I asked, running my finger along the perfect seams. She laughed and pulled out three items from under her sink: baking soda, white vinegar, and liquid dish soap. “That’s it,” she said. “Fifteen minutes, and it looked brand new.”
I didn’t believe her until I tried it myself. Now I’m sharing this simple grout cleaning method because it actually works, and you probably have everything you need sitting in your kitchen right now.

Why dirty grout destroys your whole room’s vibe
Here’s the thing about grout—once you notice it’s dirty, you can’t unsee it. Those thin lines frame every single tile in your space, creating a grid that your eye naturally follows. When that grid is stained and discolored, it makes even the most expensive tiles look cheap and neglected.
Grout is incredibly porous, almost like a tiny sponge running between your tiles. Every splash of water, drop of soap, bit of dust, and trace of whatever tracked in on your shoes gets absorbed into those lines. Over months and years, this creates a slow-building layer of grime that regular mopping simply can’t touch.
“Most people think their tiles are dirty when really it’s just the grout,” explains Maria Rodriguez, a professional house cleaner with 12 years of experience. “You can scrub those tiles until they shine, but if the grout is dark, the whole floor still looks dingy.”
The problem gets worse in bathrooms and kitchens where moisture creates the perfect environment for mold and mildew to take hold. That’s when grout goes from gray to black, especially in corners and along baseboards where air circulation is limited.

The three-ingredient miracle that actually works
This grout cleaning method uses ingredients you probably already have, and it’s surprisingly effective because each component serves a specific purpose in breaking down different types of stains and buildup.
Here’s exactly what you need and how to mix it:
| Ingredient | Amount | Purpose |
|---|---|---|
| Baking soda | 1/2 cup | Gentle abrasive that lifts stains |
| White vinegar | 1/4 cup | Dissolves mineral deposits and kills bacteria |
| Liquid dish soap | 1 tablespoon | Cuts through grease and helps mixture stick |
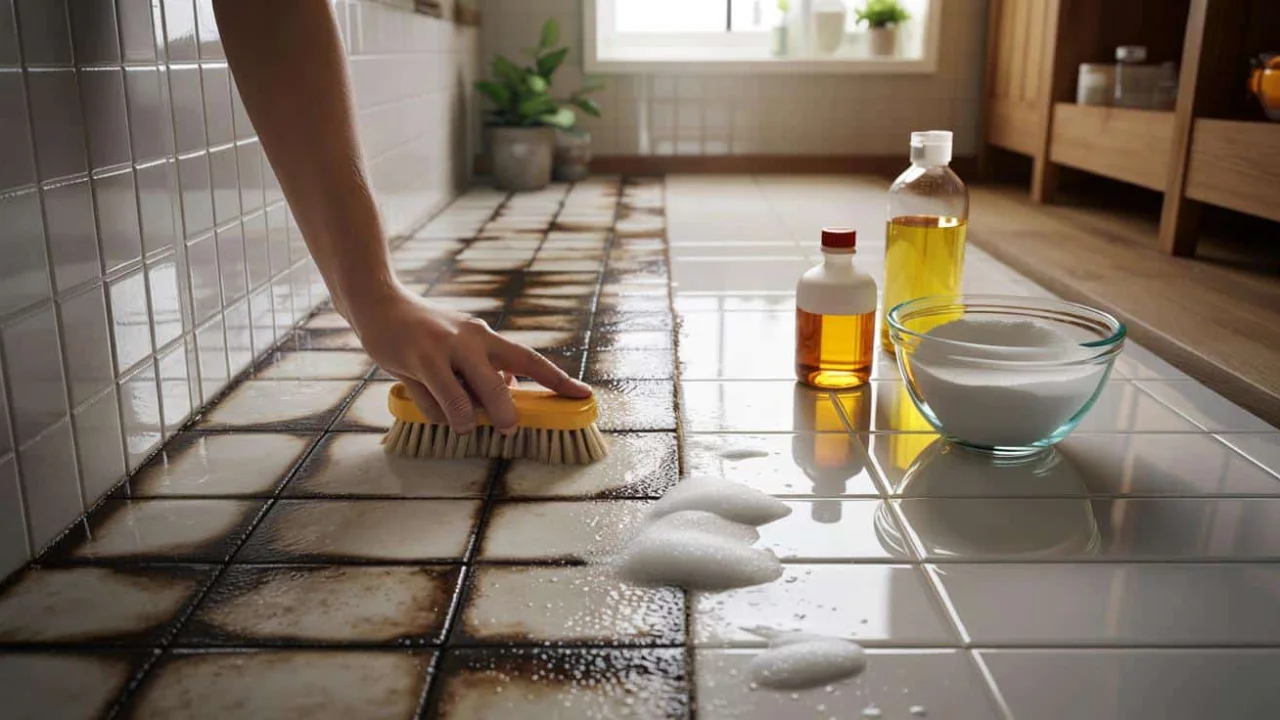
Mix these three ingredients in a small bowl until you get a thick paste. The consistency should be similar to toothpaste—thick enough to stick to vertical surfaces but spreadable enough to work into the grout lines.
The application process is straightforward:
- Apply the paste directly to grout lines using an old toothbrush or your finger
- Work it in thoroughly, making sure every bit of grout is covered
- Let it sit for exactly 15 minutes—no more, no less
- Scrub gently with the toothbrush in circular motions
- Rinse with warm water and wipe clean with a cloth
“The magic happens during those 15 minutes,” says cleaning specialist James Chen. “The baking soda starts breaking down the stains while the vinegar dissolves mineral buildup. Rush the process, and you won’t get the full effect.”
Real results that transform your space
The difference this simple grout cleaning method makes goes far beyond just cleaner lines. When grout returns to its original color, the entire room feels fresher, cleaner, and more valuable.
Take my neighbor Tom’s kitchen. He was planning to retile his backsplash because the grout had turned an embarrassing yellow-brown color that made his white subway tiles look dated. After trying this three-ingredient method, the grout returned to bright white, and suddenly his kitchen looked completely updated. He saved hundreds of dollars and hours of work.
This method works particularly well in these situations:
- Bathroom grout that’s developed mold or mildew stains
- Kitchen backsplash grout discolored by cooking grease
- Floor grout that’s accumulated years of foot traffic residue
- Shower grout affected by hard water mineral deposits
“I was skeptical because I’d tried expensive grout cleaners that barely made a dent,” admits homeowner Lisa Park. “But this simple paste worked better than anything I’d bought from the store. My shower looks like it was just installed.”
The method is also gentle enough to use regularly without damaging your grout or tiles. Unlike harsh chemical cleaners that can eat away at grout over time, this natural combination actually helps preserve the integrity of your tile work.
For heavily stained areas, you might need to repeat the process once or twice, but most people see dramatic results after just one application. The key is patience—don’t scrub aggressively or skip the 15-minute waiting period.
Professional cleaner Maria Rodriguez recommends doing this deep grout cleaning every three to four months to prevent heavy staining from building up again. “Regular maintenance with this method keeps grout looking new and prevents you from needing expensive professional cleaning services.”
FAQs
Can I use this method on colored grout?
Yes, but test it in an inconspicuous area first to make sure it doesn’t lighten the color.
What if my grout is sealed?
This method works on sealed grout too, though you might need to let it sit a bit longer for stubborn stains.
Is it safe to use around pets and children?
Absolutely—all three ingredients are food-safe and non-toxic, making this much safer than commercial grout cleaners.
How often should I clean my grout this way?
Every 3-4 months for high-traffic areas, or whenever you notice the grout looking dingy.
What if the stains don’t come out completely?
For very old or set-in stains, you might need to repeat the process 2-3 times, letting each application work for the full 15 minutes.
Can I make a bigger batch and store it?
It’s best to mix only what you need since the ingredients work better when freshly combined.