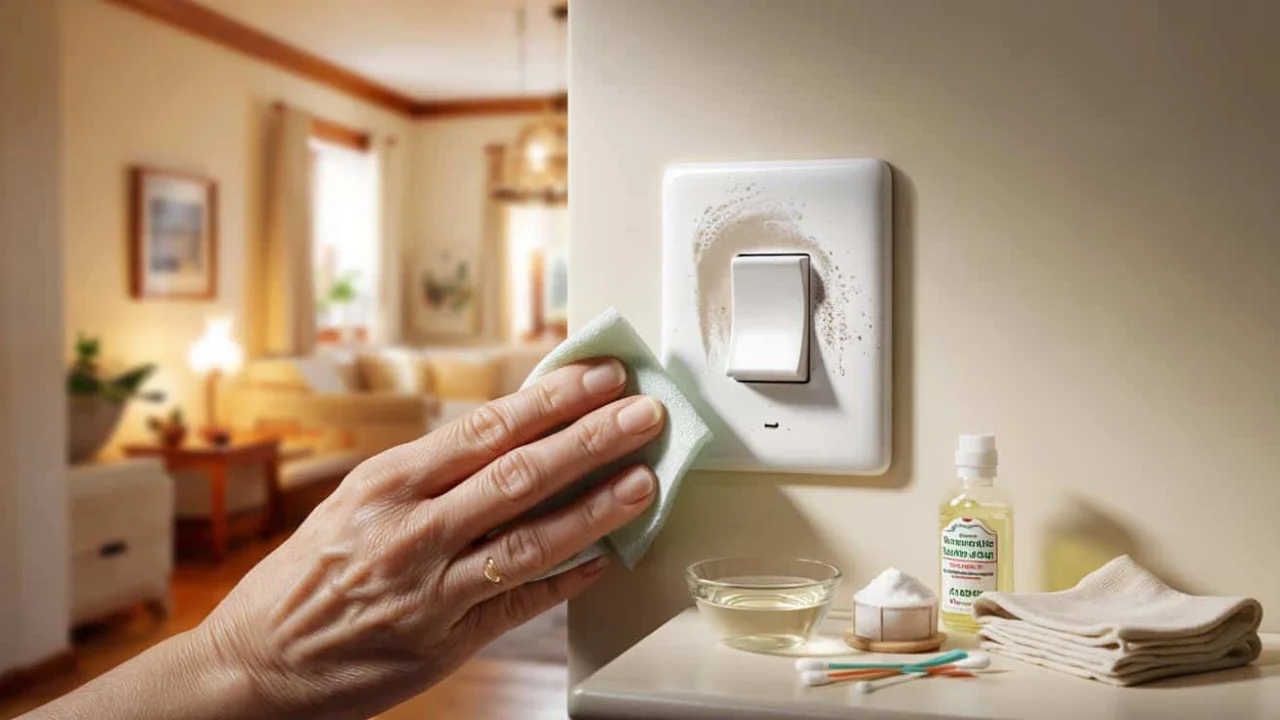
Sarah stared at the light switch in her hallway, horrified. She’d spent three hours deep-cleaning her apartment before her mother-in-law’s visit, scrubbing every surface until it gleamed. But there it was—that innocent-looking white rectangle covered in mysterious gray smudges and what looked suspiciously like peanut butter from last week’s sandwich-making disaster.
She touched it gingerly with her fingertip and immediately regretted it. The surface felt slightly sticky, with that particular texture that screams “I haven’t been cleaned in months.” How had she never noticed this before?
That’s when she remembered her grandmother, cloth in hand, methodically wiping down every switch in the house during her weekly cleaning ritual. “Everything gets dirty, Sarah,” she used to say, “even the things you don’t think about.” Grandma didn’t call them cleaning hacks—she just knew what worked.

Why Light Switches Become Grime Magnets
Light switches live in the crossfire of daily life. Think about it: every person in your house touches them multiple times a day with whatever happens to be on their hands. Cooking oil from dinner prep, lotion from the bathroom, crumbs from that late-night snack—it all ends up on that little plastic surface.
“Most people clean around light switches, not the switches themselves,” explains Maria Rodriguez, a professional house cleaner with 15 years of experience. “They wipe the wall, vacuum the floor, but skip right over the switch. It’s like cleaning around a dirty plate instead of washing it.”

The problem gets worse in humid areas like bathrooms and kitchens, where moisture acts like glue for airborne particles. Steam from showers, cooking vapors, and general household dust create a perfect storm of grime. Add pets, kids, or anyone who eats while walking around the house, and your switches become archaeological records of daily life.
But here’s the thing—once you start noticing dirty light switches, you can’t unsee them. They’re everywhere, silently judging your cleaning efforts.

Seven Time-Tested Methods to Clean Light Switch
Before diving into these cleaning methods, always turn off the power at the circuit breaker for safety. Your grandmother might have cleaned around electricity, but she also walked uphill both ways to school—some things are worth updating.
| Method | Best For | Time Required | Materials Needed |
|---|---|---|---|
| Damp Microfiber Cloth | Regular maintenance | 30 seconds | Cloth, water |
| Baking Soda Paste | Stubborn stains | 2 minutes | Baking soda, water, cloth |
| White Vinegar Solution | Grease and grime | 1 minute | Vinegar, water, cloth |
| Magic Eraser | Scuff marks | 45 seconds | Melamine sponge, water |
| Rubbing Alcohol | Disinfection | 30 seconds | 70% alcohol, cotton pad |
| Dish Soap Solution | Sticky residue | 1 minute | Mild soap, water, cloth |
| Baby Wipes | Quick touch-ups | 15 seconds | Gentle baby wipes |
The Classic Damp Cloth: Start with barely-damp microfiber cloth. Wipe gently in circular motions, then dry immediately with a clean cloth. This handles 80% of normal dirt buildup.

Baking Soda Paste Power: Mix three parts baking soda with one part water to create a paste. Apply with a soft cloth, let sit for 30 seconds, then wipe clean. Perfect for those mysterious dark spots that won’t budge.
Vinegar Magic: Equal parts white vinegar and water in a spray bottle. Spray onto cloth (never directly on the switch), wipe down, and dry. Cuts through grease like nobody’s business.
Magic Eraser Technique: Dampen slightly and gently rub stubborn marks. These work miracles on scuff marks and crayon disasters, but use light pressure to avoid damaging the switch surface.
Alcohol Disinfection: Cotton pad soaked in 70% rubbing alcohol. Wipe thoroughly and let air dry. This kills germs while cleaning—perfect for flu season or after someone’s been sick.
Gentle Soap Solution: Few drops of mild dish soap in warm water. Works wonders on sticky fingerprints and food residue. Rinse with damp cloth and dry completely.
Quick Baby Wipe Fix: Keep baby wipes handy for daily touch-ups. They’re gentle, convenient, and perfect for maintaining clean switches between deep cleans.
Making Clean Light Switch Habits Stick
The secret isn’t just knowing how to clean light switch surfaces—it’s building the habit so they never get disgustingly dirty again. Professional cleaner David Chen puts it simply: “Add light switches to your weekly routine. Two minutes during regular cleaning prevents two hours of scrubbing later.”
Start by identifying your home’s high-traffic switches. Kitchen lights, main hallways, and kids’ bathroom switches need attention twice a week. Bedroom and closet switches can go longer between cleanings.
Keep a small spray bottle with your favorite cleaning solution and microfiber cloths in each major area of your house. When you notice a smudge, deal with it immediately instead of adding it to your mental “someday” list.
The real game-changer? Teaching everyone in your household about the two-second rule: if you notice your hands are dirty when reaching for a light switch, clean them first. Prevention beats cure every time.
“My grandmother never let dirty switches slide because she knew something most of us forget,” shares home organization expert Jennifer Walsh. “Small messes become big problems when ignored. Clean as you go, and cleaning never becomes overwhelming.”
Consider this your wake-up call. Look around your house right now. How many light switches are silently judging your cleaning efforts? Start with the worst one, use any of these time-tested methods, and prepare to feel ridiculously proud of something so small yet so satisfying.
Your grandmother would be proud. And your mother-in-law will definitely notice.
FAQs
How often should I clean light switches?
High-traffic switches need weekly cleaning, while bedroom and closet switches can go 2-3 weeks between cleanings.
Is it safe to use water near electrical switches?
Always turn off power at the circuit breaker first, use minimal moisture, and dry completely. When in doubt, use barely-damp cloths rather than wet ones.
Can I remove the switch plate for deeper cleaning?
Yes, but turn off power first. Unscrew the plate, clean both sides, and ensure everything is completely dry before reinstalling.
What about textured or decorative switch plates?
Soft-bristled toothbrushes work great for getting into grooves and patterns. Use gentle pressure and your preferred cleaning solution.
Are disinfecting wipes safe for all switch types?
Most modern switches handle disinfecting wipes fine, but avoid anything too harsh on older or decorative plates. Test in an inconspicuous area first.
Why do some switches yellow over time?
UV exposure, smoke, cooking vapors, and age cause yellowing. Baking soda paste or magic erasers can help restore whiteness, but severely yellowed switches might need replacement.